
Today we're going to do something a little bit different at CKC and boy am I excited about it! In my early crafting/sewing days my first love was card-making. Scrapbooking was just getting to be popular at the time and I found that cards were much smaller and more manageable pieces for me (a major perfectionist here) - plus I liked being able to pop one in the mail to share with friends or family. One of my favorite techniques that I learned over the years in making cards is machine stitching. And since we're all about sewing here at CKC, I thought this would be the perfect activity for all of us! Let's sew up a little love for a friend.

The pink card in the picture above took me about five minutes to make. No joke! If you have never machine stitched a card before, there are some basic guidelines you will need to know before you get started and then it will be a breeze!
1 - Use one machine needle specifically for card-making. It can be any kind of needle and you can go ahead and use one that is already dull from using awhile on fabric. But after using a needle on cardstock, it will not be good for fabric.
2- Sew on cardstock, not paper. If you have a cute paper you want to use, give it a cardstock backing first.
3 - Don't sew through glue or tape. It gums up the needle and the machine. I do use glue and tape to attach paper layers before sewing, but I am careful to put them in places that won't be sewn.
4 - Make sure your bobbin is plenty full of thread. It's really annoying when you run out because it leaves a trail of paper holes with no thread.
5 - Just in case tiny pieces of cardstock get punched into your machine, be sure to vacuum it out occasionally. (I've never actually seen tiny pieces in there and maybe they don't exist. But we should clean our machines often anyway, right?)
6 - This is the last rule and probably the most important. When we get to the end of our stitching, we do not want to backstitch (it won't blend in) or clip the threads close to the paper (they will fall through). Instead, we will stop stitching and pull the card away, leaving several inches of thread that we can pull through to the back and fasten. Here are some pictures to explain:

First I sewed across the paper and turned around and came back. I left the threads long at the beginning and the end. If I were to clip them close to the paper, the stitches would go through and unravel. But we are not going to let that happen!

All we need to do is take one of our ends and thread it into a needle and poke it back through the previous hole so it is on the back side of the paper. Repeat with the second thread.

The back of the cardstock will now look like this. At this point we can either tie the two ends together in a double knot or we can simply tape them in place. It depends on whether the back will be visible when we're done or if we will be gluing it onto a separate blank card. The tied knots look a little nicer but both are secure enough. Remember these stitches will not be going through the washing machine!

Once the threads are secure on back, the front of the card will look like this. This process is all really quick. Remember I made that first card in five minutes!
Now that we have the rules out of the way, let's talk about the fun stuff! There are so many options we have when sewing cards with a machine. Even a straight stitch can be decorative to outline pictures. But we don't need to limit ourselves to that. Even if we only have a few stitches available on our machines, just changing the stitch length creates a totally new look. I did a few on my machine to demonstrate:

The first line on the left is a straight stitch at 2. The next is a straight stitch at 4. Then I did a zigzag at 2 and then a zigzag at 4. After that I went a little crazy having fun with all of my stitches. Most of them aren't even intended as decorative stitches. One of my favorites is actually the blind hem stitch - it just looks so cool. I have a fairly basic model of a machine and I was able to do these without getting too creative. I suggest that you make a cardstock stitch sample like this using your machine and label the rows with your settings so that when the cardmaking bug hits you'll be ready!
As far as the sewing itself, cardstock is a lot like sewing on fabric. We need to hold the threads when we start, we lift the presser foot when we want to turn a corner, and we can sew just as fast on cardstock as we do on fabric. One of the only differences is that on paper what you see is what you get - meaning that every time we let the needle pierce the paper, the hole is going to be there. When I make a mistake, I generally leave the mistake there and call it a creative oopsie, because if I remove the stitches (as I would with fabric) I will be left with a row of holes that obviously were not meant to be there. I have lots of mistakes in the following cards but nobody has to know!

I thought this would be a fun design for Easter. I like to zigzag around unique shapes like the bunny head. Then if I had just glued the strip on the left, it would look boring and out of place. But by giving it that really cool smocking stitch along the edges, it looks really fancy and ties the card together. (Your friends will be so impressed!)

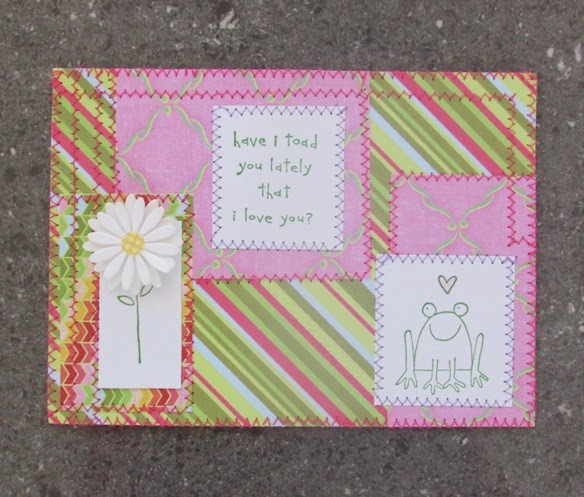
The zigzag stitch is my best friend! It works around almost every border. It's especially fun when creating patchwork style cards like this. I made this one using paper on cardstock but I have done quite a few where I used fabric scraps from a fabric gift I made. Why not make a matching gift card to go with that new baby shower dress? (See?!? This is good stuff!)
I enjoy stamping cards and sometimes it takes me a long time to design a layout I want that ties the stamped images together. But honestly, when I know I'm going to be sewing on a card I just throw the pieces on there because I know I can blend the borders and make it look like it belongs. (You probably thought this one was all planned out and balanced until I just admitted that, right?)
And while I'm keeping it real, let's go ahead and take a look at the back of my cards:

You can see I decided to tape these ends instead of tying them. The entire card front will be glued onto a blank card though so it won't matter.

On this card I tied the ends nicely and then taped them in place. I would maybe leave the back of this card to be seen because it's pretty cool.

And here's the third one. A little out of control, right? Oops. And it doesn't matter at all because I will be gluing it to a blank card.

This is my favorite card I made today. The eggs are each individually cut out, stamped, and stitched. And did you notice the grass? I was having too much fun!
These are just a few ideas for Easter/Springtime and I know you'll be able to think of so many more! One of the first cards I ever made was a big white circle with red stitching that made it look like a baseball. I have used a decorative stitch as lights on a Christmas tree and also elaborate zigzag designs across Easter egg cards. It's also really cute to do several flower cut-outs with different stitching on each of them. There's no limit to what we can sew on our handmade cards. Let's share some of our sewing talent with our friends through mail the old fashioned way! Who doesn't love to get happy mail?
Let's Create! ~ Kristen